Complete guide: your perfectly configured eSIM on Android
Follow this A-to-Z guide to travel with peace of mind: installation before you leave, and configuration once you arrive (including APN settings if your phone requires it). It should only take about ten minutes in total.
1. Before you leave: install your eSIM
Make sure you have a stable internet connection. The process can take up to 15 minutes.
1
Open the voilà app, then go to your eSIM page.
2
Tap on "Install eSIM": you'll be redirected to your phone's settings and the eSIM will download automatically.
3
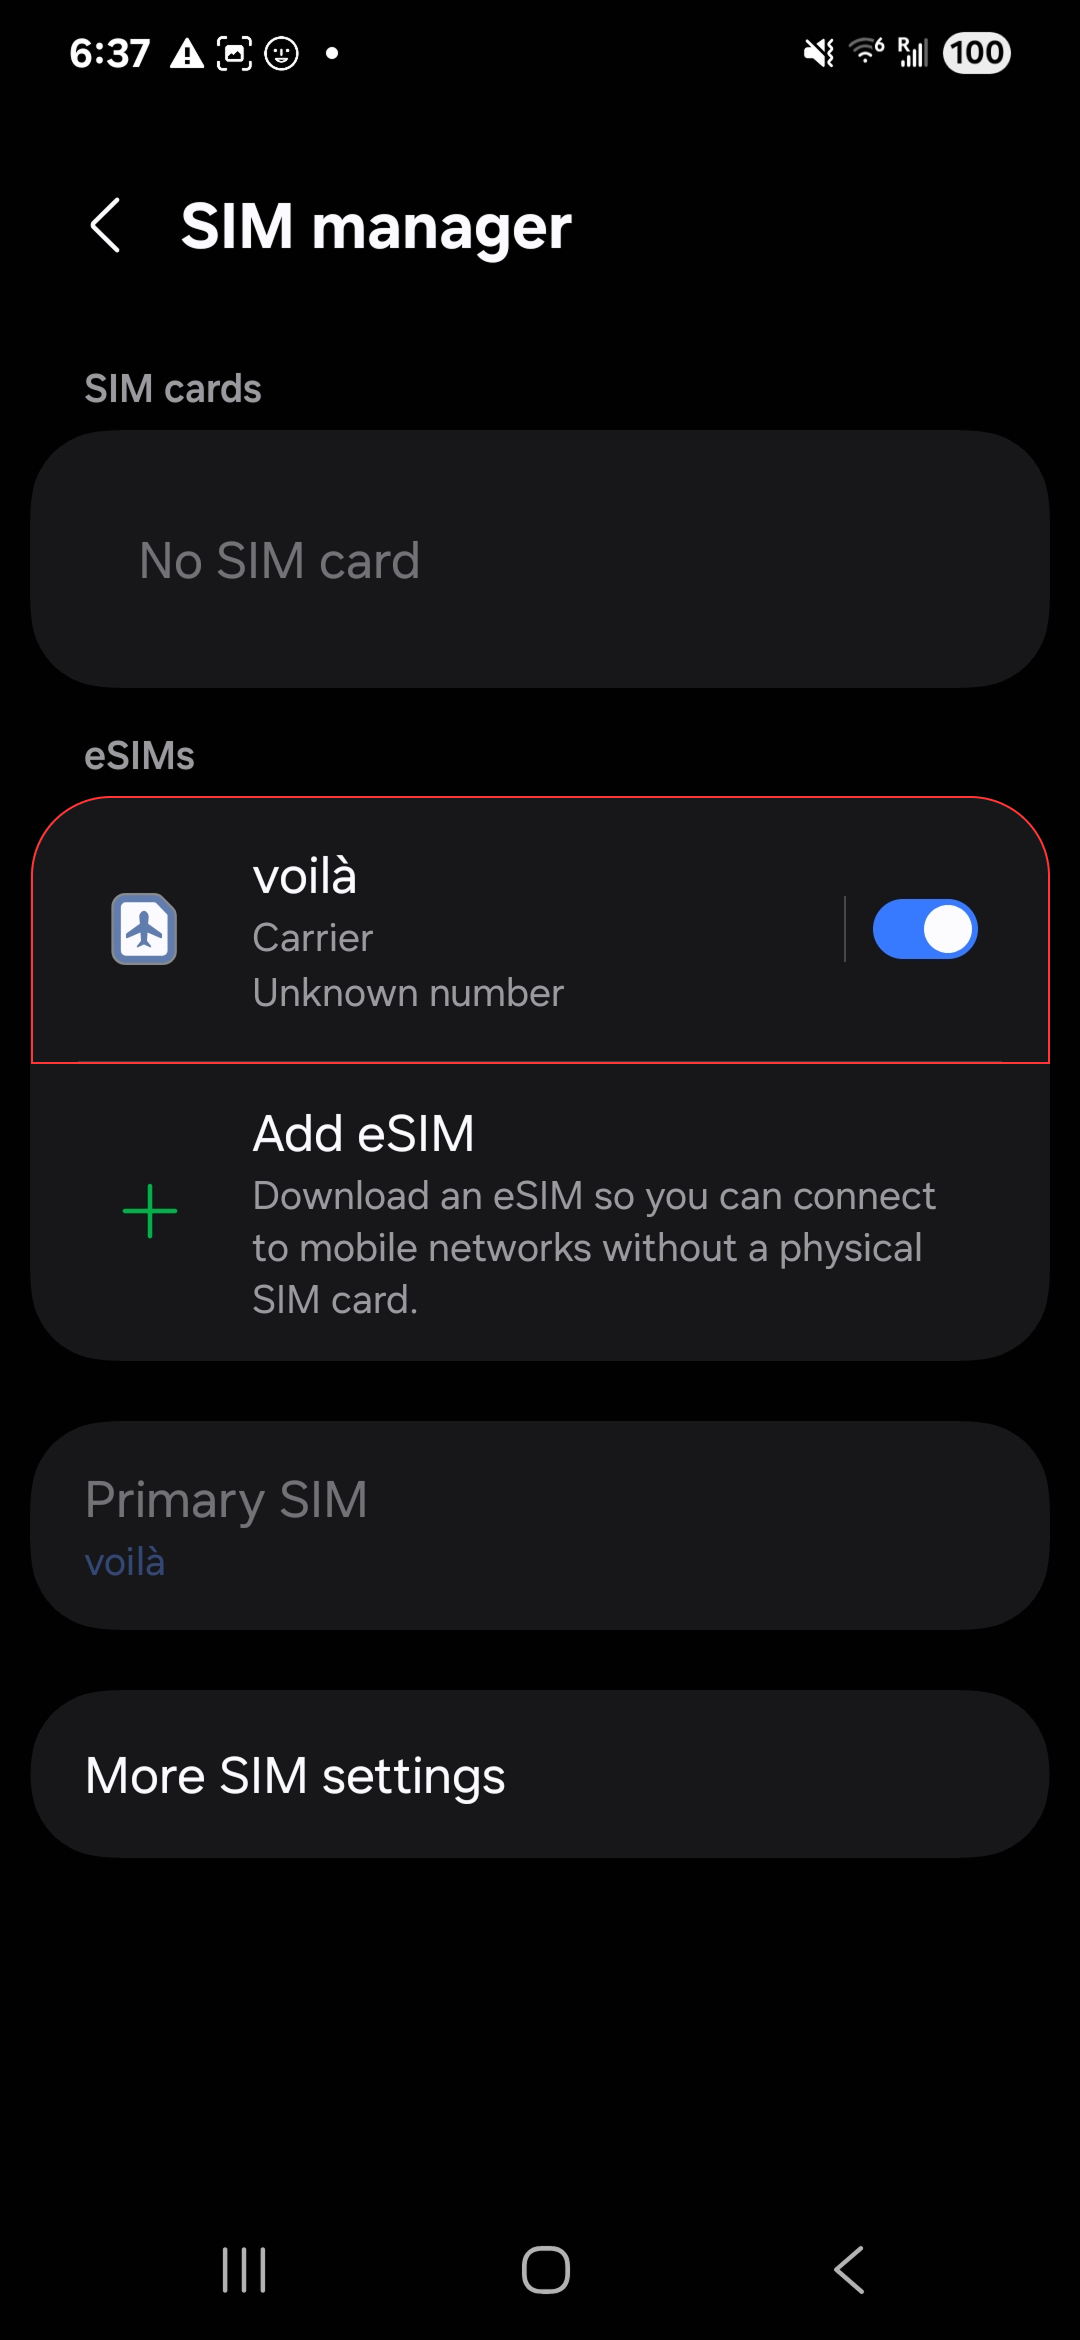
Once you've installed your eSIM, it will appear in your SIM Manager.
4
Its name can be random: rename it with the name of your destination so you can remember it.
2. Destination: set up your eSIM
This part must be done on the plane, or once you've arrived at your destination.
1
GB to Settings > Connections > Mobile networks and turn off your current SIM.
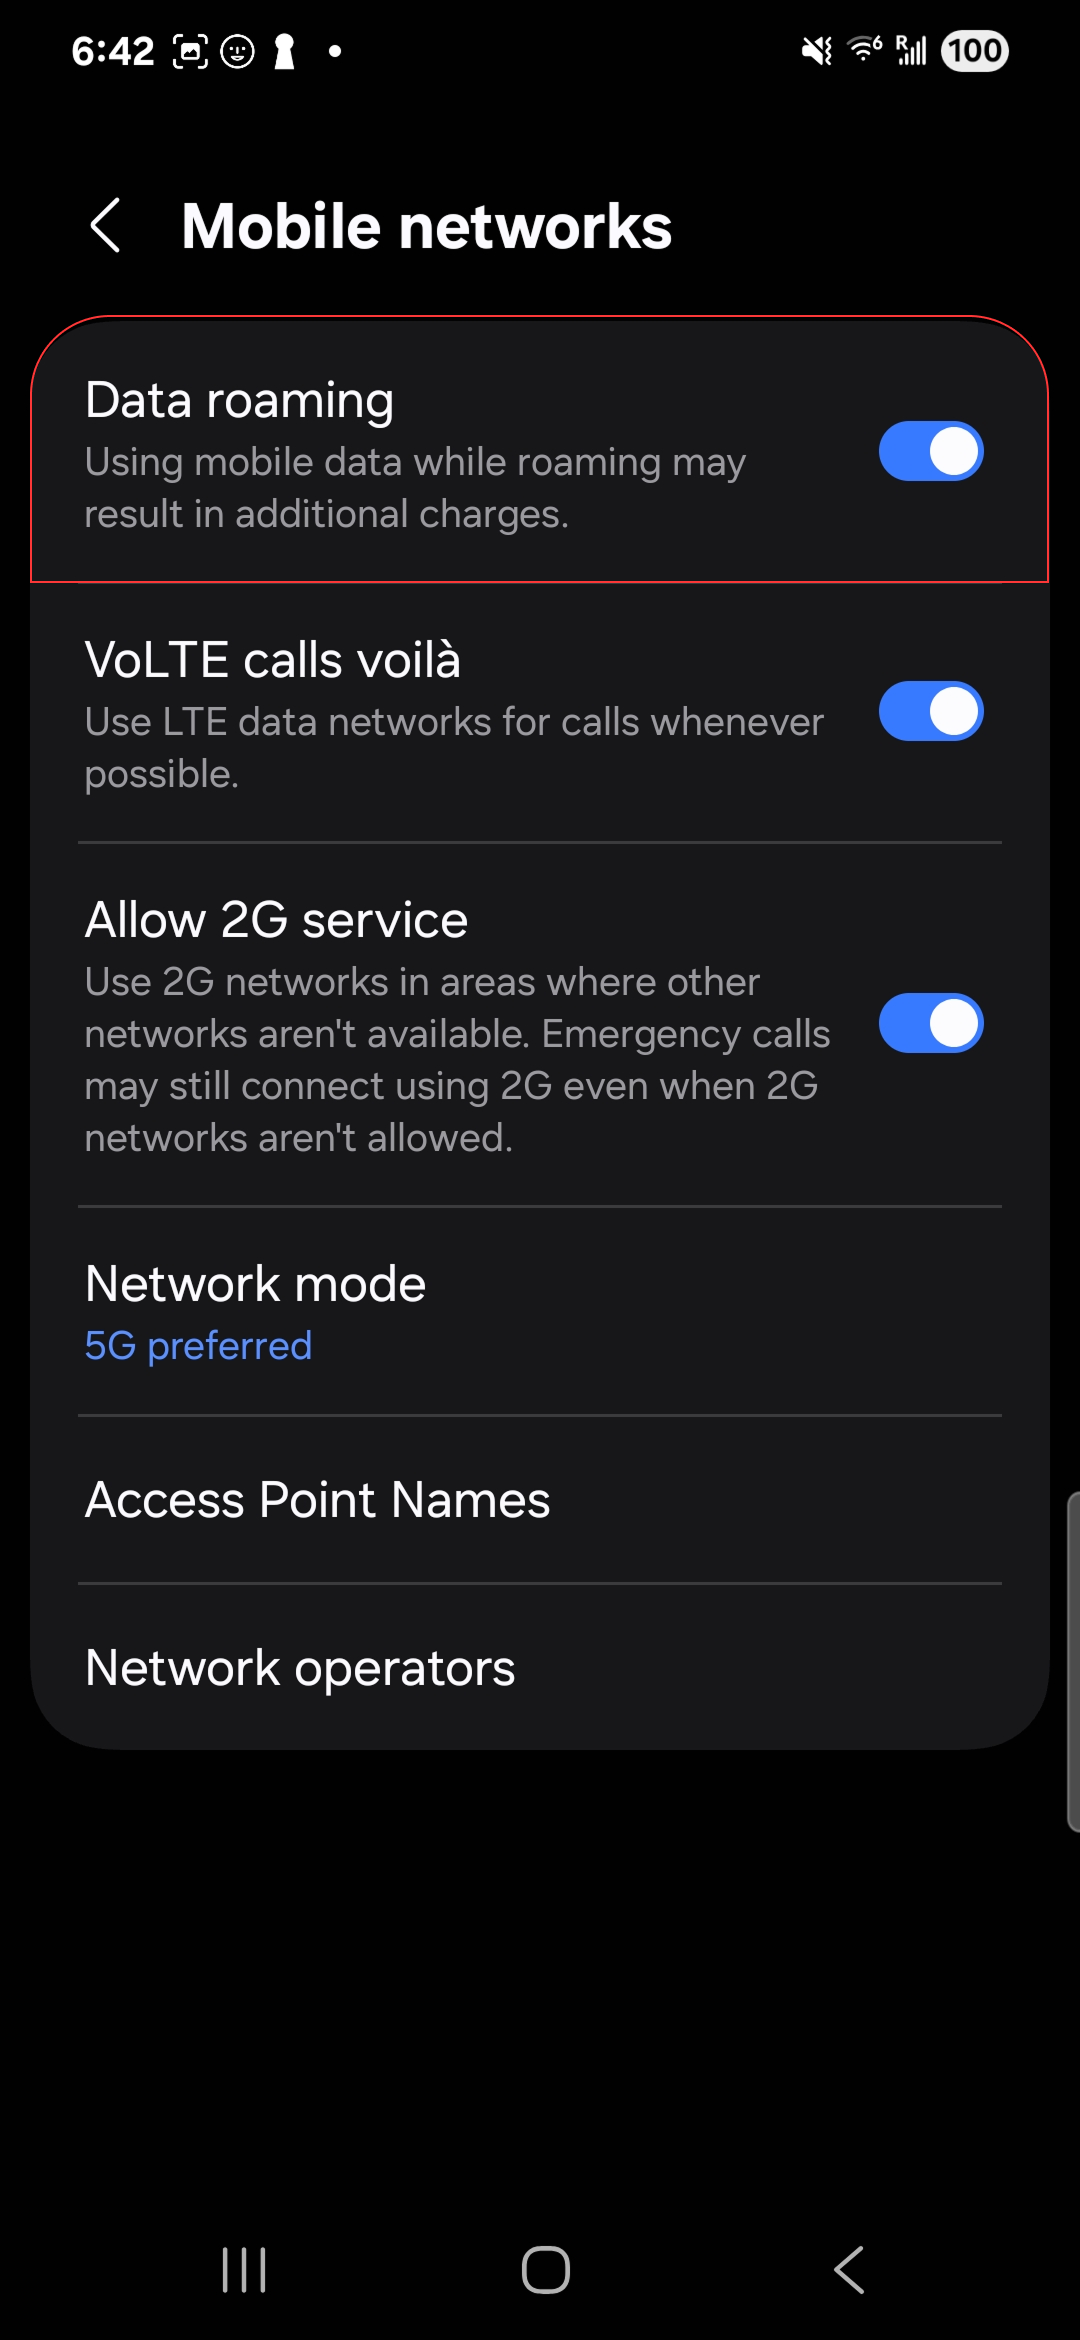
2
In your eSIM settings, enable data roaming.
3. No internet? Configure your APN
On some Android phones, the eSIM requires you to manually add an APN (Access Point Name) to connect to the internet. You can find your eSIM's APN value in the voilà app, on your eSIM details page, or in your purchase confirmation email.
1
Open Settings > Network & internet > SIM cards.
2
Select your voilà eSIM, then "Hotspot Name".
3
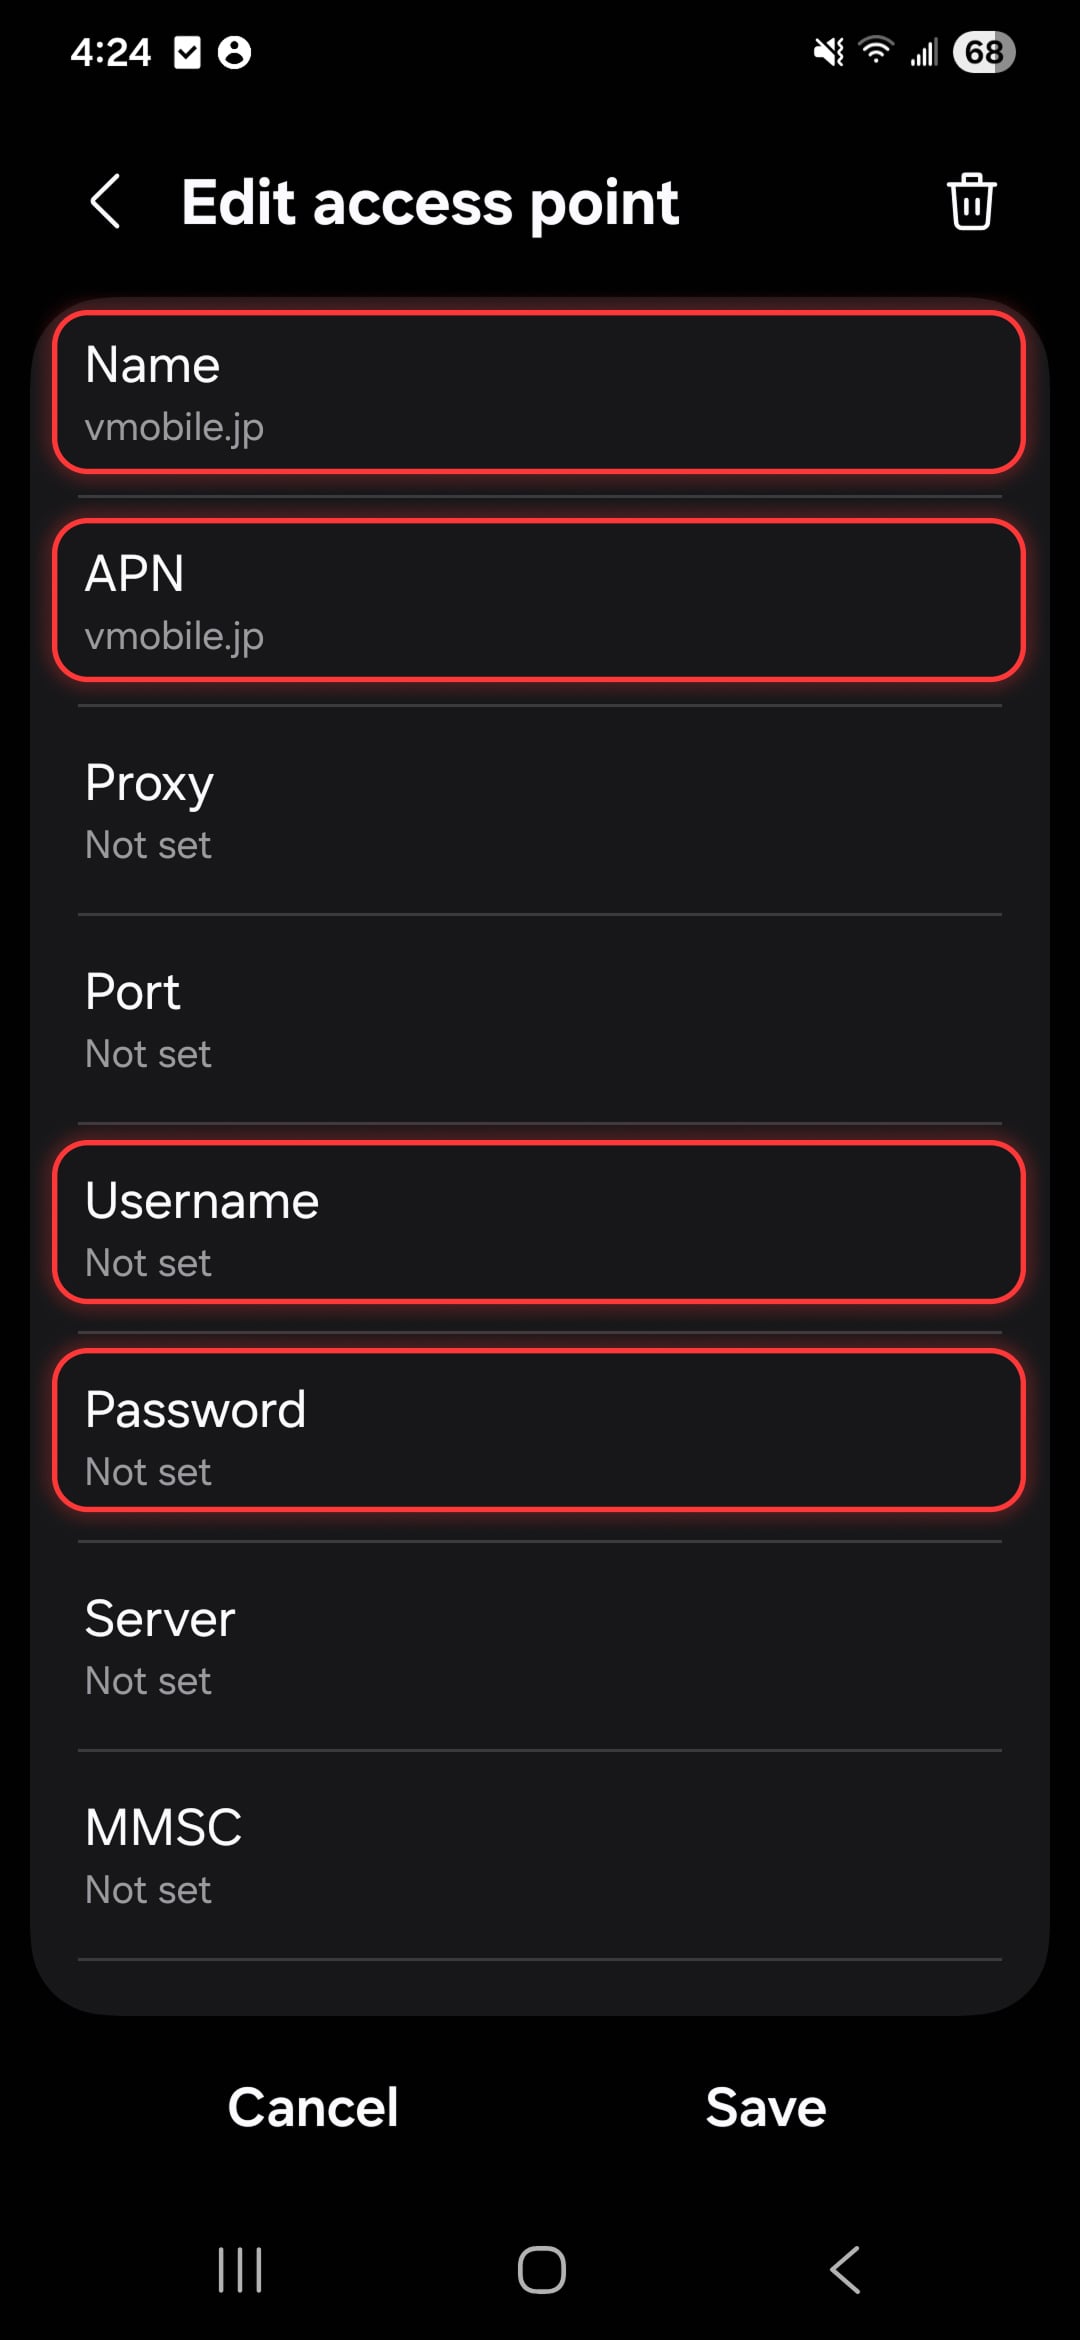
Tap + to add an APN.
4
Fill in Name and APN with the value shown in the app or in your purchase confirmation email, and leave Username and Password blank.
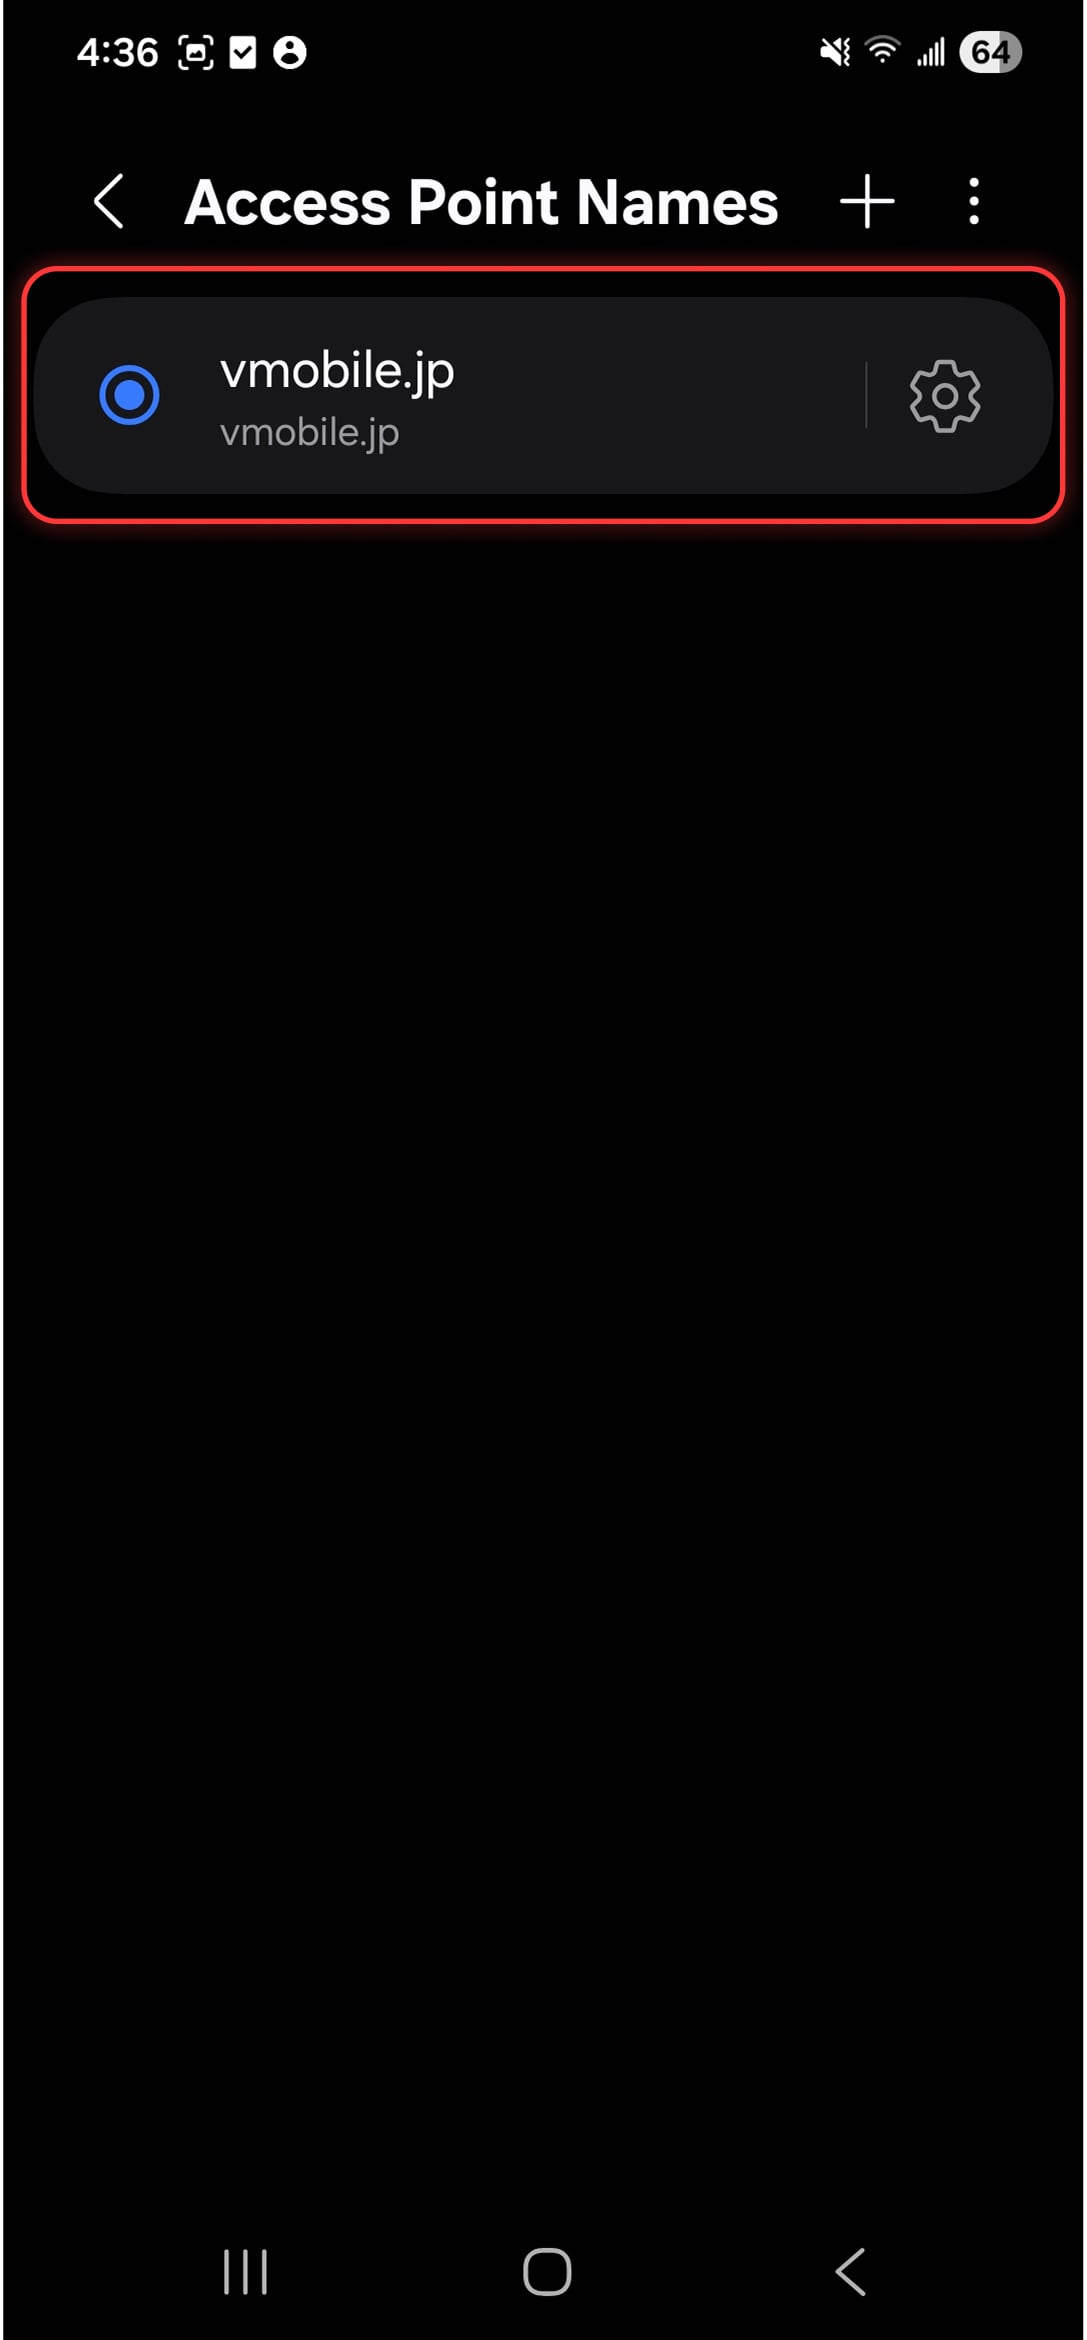
5
Save it, then make sure the new APN is properly selected.